
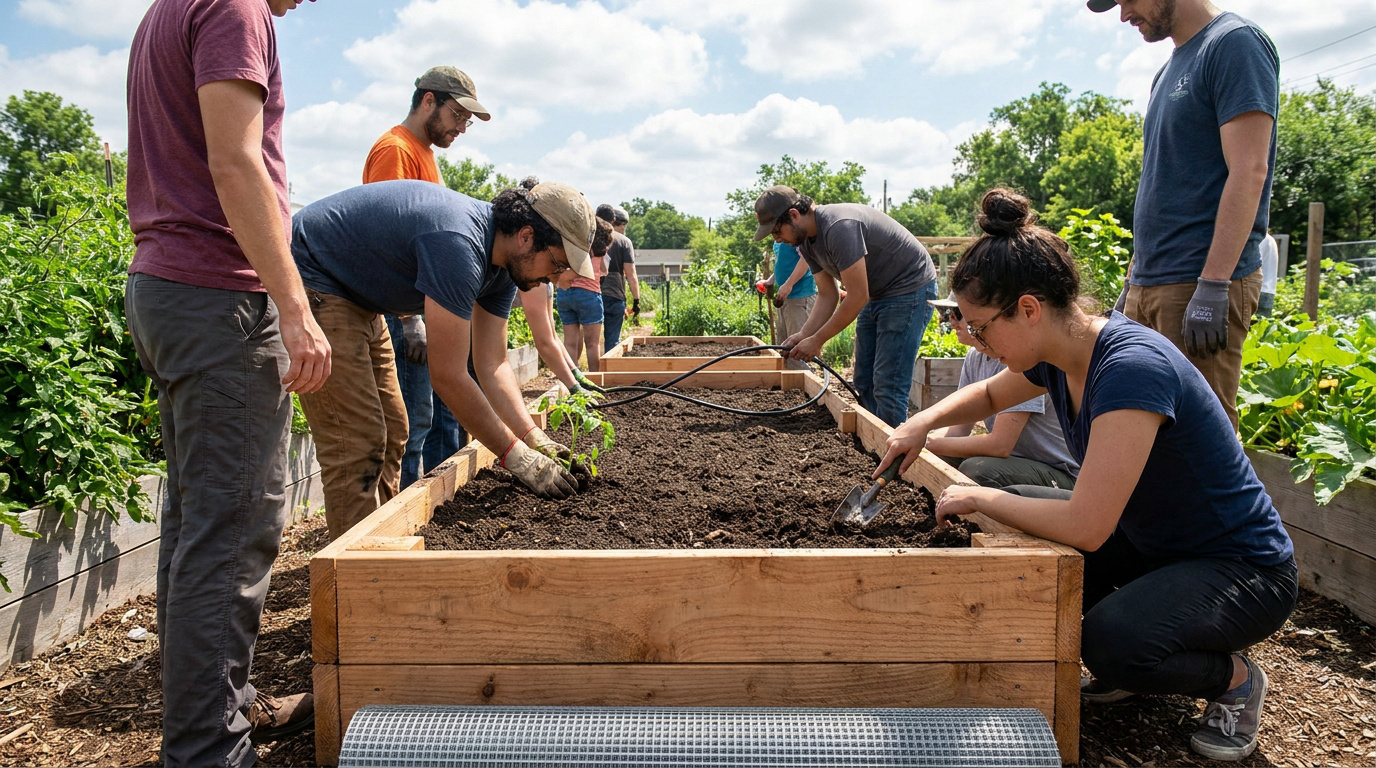

Key takeaway: Successful community beds require rot-resistant wood like black locust, six to eight hours of sunlight, and a four-foot width for ergonomic reach. Using hardware cloth and cardboard prevents pests and weeds, while elevated 30-inch frames ensure accessibility for seniors. This strategic setup boosts long-term yields and fosters inclusive social bonds through shared, durable infrastructure.
Gardening activities like digging and weeding are widely associated with improved physical fitness and reduced urban stress. Yet, many aspiring cultivators hesitate to start because they fear the isolation of a solo plot or the rapid rot of poorly built structures.
This guide explains how Building a Community Garden Bed: Digging, Planting and Showing Up creates a resilient, shared ecosystem through smart material selection and collective leadership. We will look at the technical steps and social strategies needed to ensure your green space thrives for years to come.
- Fundamental Criteria to Build Community Garden Bed Plots
- 3 Factors for Selecting Materials and Ergonomic Dimensions
- How to Assemble a Structurally Stable Garden Bed?
- Collective Leadership and Long-Term Maintenance Strategies
Fundamental Criteria to Build Community Garden Bed Plots
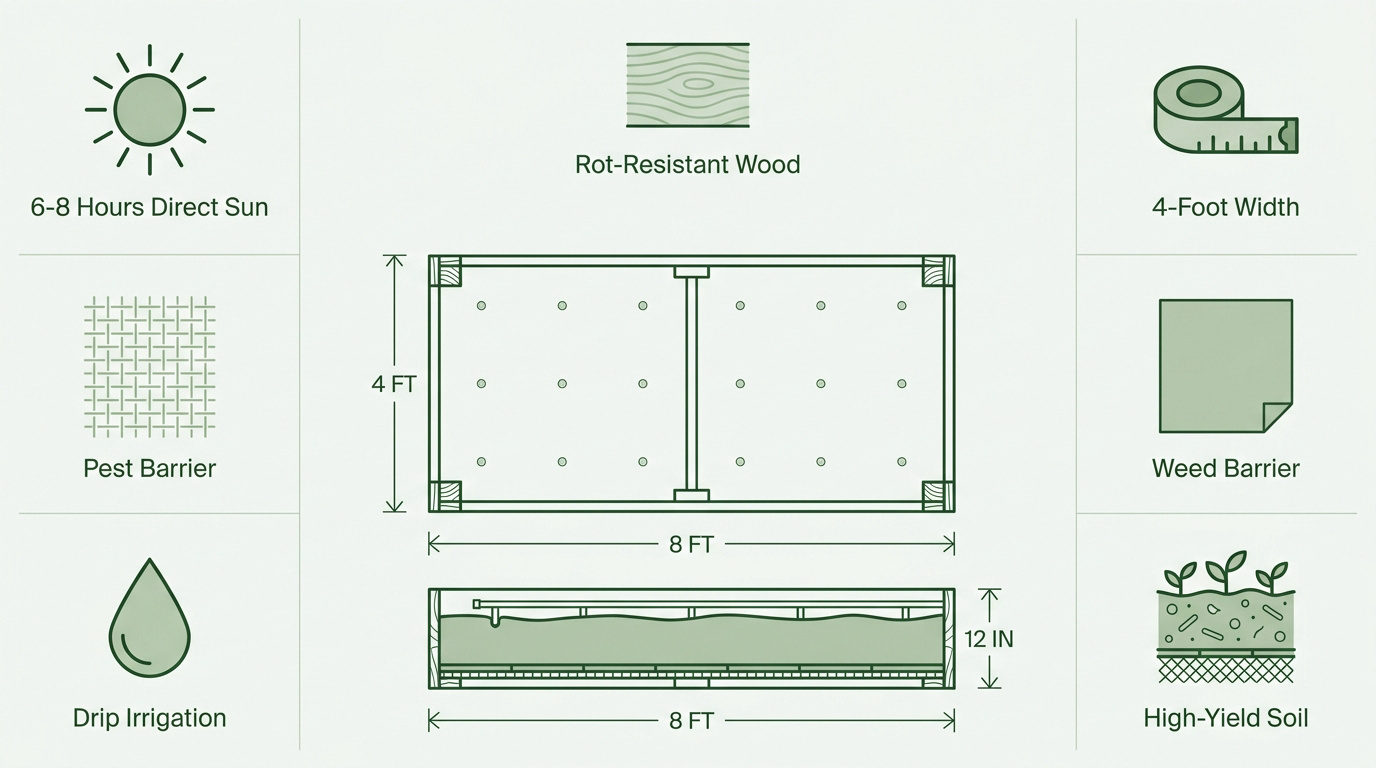
Successful community beds require six to eight hours of direct sunlight, rot-resistant wood such as cedar, redwood, or black locust, and a four-foot width for reachability. Using hardware cloth and cardboard prevents pests and weeds, while drip irrigation ensures consistent hydration for high-yield soil.
Properly setting up the physical site is the first hurdle, so let’s look at how light and ground conditions dictate your success.
Evaluating Sunlight Exposure and Soil Quality
Track the sun across your site daily. Most fruiting and root vegetables strictly require six to eight hours of direct light, while leafy greens can tolerate somewhat less, a guideline widely recommended by cooperative extension programs across the United States. Avoid placing beds in shadows cast by tall buildings or dense tree canopies.
Test your soil before building. Urban ground can hide contaminants such as heavy metals. These pollutants pose real risks in city environments.
Watch how water moves after rain. Avoid areas where water pools constantly. Standing water rots wooden frames and suffocates sensitive root systems.
Check the ground stability. Ensure the site is level. Stable soil prevents future erosion.
Water Access and Proximity to Tool Storage
Map the distance to your water source. Lugging heavy hoses across long distances kills gardener motivation. A pressurized source must be within easy reach.
Plan your pathway logistics carefully. Place beds near main walking routes. This makes moving heavy mulch bags or harvests much easier.
Create a central hub for the group. Designate a specific space for shared tools and compost. Keeping equipment close saves vital energy.
Prioritize storage visibility. Keep tool sheds visible. This naturally deters theft or misuse.
Strategic Layout for High-Yield Companion Planting
Use a grid design for easy movement. Leave enough space for wheelbarrows between rows. Tight gaps lead to trampled plants and frustrated volunteers.
Orient your beds from north to south. This prevents tall crops like corn from shading smaller greens. It maximizes light for everyone.
Integrate trellises on the north end. Using vertical space doubles your harvest. It keeps the bed footprint small while increasing production.
Group plants by water needs. Building a Community Garden Bed: Digging, Planting and Showing Up requires smart irrigation. Simple grouping boosts overall health.
3 Factors for Selecting Materials and Ergonomic Dimensions
Choosing the right spot is only half the battle; now you need to pick materials that won’t rot by next season.
Comparing Cedar, Redwood, and Non-Toxic Sealing
Wood selection is your first hurdle. I always recommend cedar or redwood for their natural rot resistance. These woods last years without needing chemical treatments that leak into soil.
Avoiding toxins is non-negotiable. Stay away from old pressure-treated lumber. Modern food crops deserve clean, chemical-free environments to grow safely.
Natural sealing methods protect your hard work. Use raw linseed oil or food-safe liners. These simple steps significantly extend the life of your wooden investment.
Optimal Dimensions for Reachability and Root Depth
The four-foot rule is a classic for a reason. Never make a bed wider than four feet. You must reach the center from either side without stepping inside.
Depth requirements dictate your harvest success. Aim for twelve inches of soil. Deep roots mean stronger plants and better drought resistance during hot summer months.
Structural bracing keeps everything tight. Use metal mending braces for long beds. This stops the wood from bowing under heavy wet soil.
Designing for Accessibility and Senior Mobility
Elevated gardening changes the game for inclusivity. Raise some beds to thirty inches high. This allows seniors or those in wheelchairs to garden without painful bending.
Pathway surfaces need careful thought. Create wide, flat paths using crushed stone or pavers. Stability is vital for gardeners using walkers or canes.
Seating rails are a small touch that makes a huge difference. Add a wide top cap to the bed frame. It provides a perfect spot for resting while weeding.
How to Assemble a Structurally Stable Garden Bed?
Once you have your lumber and dimensions, the focus shifts to the physical labor of putting it all together.
Corner Supports and Fastening Methods for Longevity
Heavy-duty framing requires four-by-four posts in every corner. These provide a massive anchor for sideboards, preventing warping. Solid corners ensure your bed stays square for a decade of heavy use.
Screw placement is vital. Drive galvanized deck screws directly into the posts. Never screw into the end-grain of the boards, as this prevents the frame from pulling apart under soil pressure.
Always drill pilot holes before fastening. This simple step prevents expensive cedar from splitting and weakening the entire structure. It takes minutes but saves your long-term investment.
Leveling Ground and Installing Hardware Cloth for Pests
Ground preparation is essential. Remove all turf and level the site perfectly. An unlevel bed leads to uneven watering and runoff issues. A flat base keeps the wooden structure stable.
Staple half-inch hardware cloth to the bottom for rodent protection. This metal mesh stops gophers and moles from eating vegetables from below. It is a physical barrier that actually works.
Secure the mesh firmly to the inner frame. Leave no gaps for small pests to squeeze through. A tight seal is your best defense against hungry underground critters.
Preventing Weeds with Cardboard and Landscape Fabric
Place thick brown cardboard at the bottom to smother weeds. This method kills existing grass without toxic sprays. It eventually breaks down into rich organic matter for the soil.
Ensure cardboard sheets overlap by several inches. Light must not reach the soil surface to prevent dormant seeds from sprouting. Total darkness effectively stops unwanted growth.
Wet the cardboard thoroughly before adding soil. This kickstarts decomposition and encourages earthworms to move upward. Building a Community Garden Bed: Digging, Planting and Showing Up starts with this living foundation.
Collective Leadership and Long-Term Maintenance Strategies
Building the bed is just the start; keeping the community organized and the soil rich is the real challenge.
Automated Drip Irrigation and Soil Health Techniques
Smart watering saves time. Install battery-operated timers for drip lines. Consistent moisture is better for plants than sporadic, heavy manual watering by volunteers.
Soil replenishment is vital. Add fresh compost every year. Top-dressing the soil provides nutrients without the need for labor-intensive tilling or digging.
Mulching benefits the ecosystem. Apply straw or wood chips to the surface. It suppresses weeds and keeps roots cool during heatwaves.
Forming Leadership Teams and Maintenance Schedules
Defining roles prevents chaos. Appoint leads for communication and tool repair. Clear responsibilities prevent the “bystander effect” where no one fixes the broken hose.
Establishing rules ensures harmony. Set clear guidelines for pesticide use and harvesting. Everyone needs to know what is shared versus what is private.
Shared labor builds bonds. Create a rotating calendar for communal chores. Weekly weeding of paths keeps the space inviting for everyone.
Measuring Success Through Food Production and Engagement
Yield tracking shows value. Weigh the total harvest each month. Hard data proves the garden’s nutritional value to sponsors and local government officials.
Social impact matters most. Survey members about their mental well-being. The community bonds formed are often more valuable than the vegetables themselves.
Financial analysis justifies effort. Compare garden costs to market prices. Showing real savings helps justify the initial investment in high-quality materials.
By selecting rot-resistant cedar and ergonomic four-foot widths, you ensure a durable, accessible space for all. Installing hardware cloth and cardboard provides immediate protection against pests and weeds. Start your community garden bed today to cultivate lasting food security and social bonds that will flourish for seasons to come.
FAQ
What are the primary factors to consider when choosing a location for a community garden bed?
Selecting the right spot requires a balance of environmental conditions and practical accessibility. You must ensure the site receives adequate direct sunlight daily, avoiding shadows from tall buildings or dense trees. It is also vital to test the soil for urban contaminants and check for proper drainage to prevent water from pooling around your structures.
Beyond the soil, think about the gardeners’ needs. The beds should be located near a pressurized water source to avoid the exhaustion of lugging heavy hoses. Proximity to tool storage and main walking routes ensures that transporting harvests and mulch remains easy for volunteers of all ages.
Which wood species are most effective for long-lasting raised beds?
For maximum durability without the use of toxic chemicals, cedar and redwood are the premier choices. Both species possess natural oils that resist rot and insect damage, ensuring your investment lasts for years. While they may have a higher initial cost, their longevity in outdoor environments makes them highly cost-effective over time.
If you are working with a tighter budget, hemlock or cypress are durable alternatives that offer decent rot resistance. Regardless of the wood chosen, avoid old pressure-treated lumber that might leach chemicals into your food crops. Using food-safe liners or raw linseed oil can further extend the life of the wood frame.
What are the ideal dimensions for a community garden plot?
To maintain ergonomic health and accessibility, a garden bed should never be wider than four feet. This width allows gardeners to reach the center from either side without stepping into the bed, which prevents soil compaction. For depth, aim for at least twelve inches of soil to encourage strong root systems and improve drought resistance during the summer.
Inclusivity is also a key design factor. Raising some beds to a height of thirty inches allows seniors or individuals in wheelchairs to participate comfortably. Additionally, ensure that pathways between plots are at least 18 to 45 cm wide to accommodate movement and tools safely.
How can I protect my garden beds from weeds and underground pests?
A structurally sound bed starts with a clean foundation. Before adding soil, place a layer of thick brown cardboard at the bottom to smother existing grass and weeds. Overlap the edges by several inches to ensure no light reaches the ground, and wet the cardboard thoroughly to jumpstart decomposition and attract beneficial earthworms.
To stop rodents like gophers or moles from attacking your vegetables from below, staple half-inch hardware cloth (a sturdy metal mesh) to the bottom of the frame. Ensure there are no gaps between the mesh and the wood, creating a physical barrier that protects your roots while still allowing for proper drainage.
How do we manage maintenance and leadership in a shared garden?
Success in a community setting depends on clear organization and shared responsibility. Appointing leads for specific tasks, such as tool repair or communication, prevents the “bystander effect” and ensures maintenance doesn’t fall on just one person. A rotating calendar for communal chores like weeding pathways helps keep the space inviting for everyone.
Implementing automated systems can also reduce the burden on volunteers. For example, installing battery-operated timers for drip irrigation ensures consistent moisture for the plants. Regularly replenishing the soil with fresh compost and using mulch will suppress weeds and maintain high yields with less manual labor.
Read next: Outdoor Scavenger Hunt: How to Plan One That Works for Any Age
